Add Social Share Buttons To Squarespace 7.1 Blog
If you are blogging on Squarespace 7.1 and want to add social sharing buttons to your posts, you can add them using a free 3rd party app. Some social sharing button options include addthis.com, shareaholic.com, and sharethis.com.
I’ll show you how to install and style AddThis Inline Social Share buttons.
I spent quite a bit of time initially with another plugin, but I didn’t find it user friendly either to install or style. Then I spotted some snazzy looking share buttons on a Squarespace instructor’s 7.1 site, and AddThis is what she used. I did the same and was pleased with the design and ease of install.
I also have a couple social share hacks:
to add the buttons to ALL your blog posts at once
a code tweak to center justify your buttons.
Note: Adding social share buttons requires a business plan or higher on Squarespace. It requires code injection, so won’t work on personal plans.
Ready? Let’s get started!
[This post contains affiliate links. Click here to read my full disclosure.]
1. Go to addthis.com
Click the “Get started, it’s free” button to create your free account.
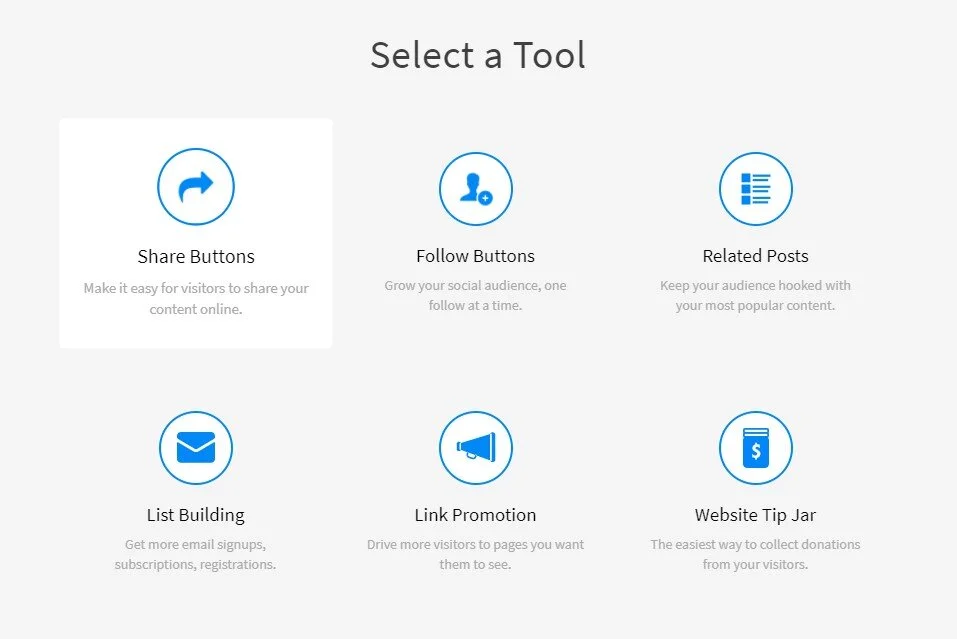
After signing up, it will take you to the SELECT A TOOL page. Select “Share Buttons.”
2. Select a Tool Type
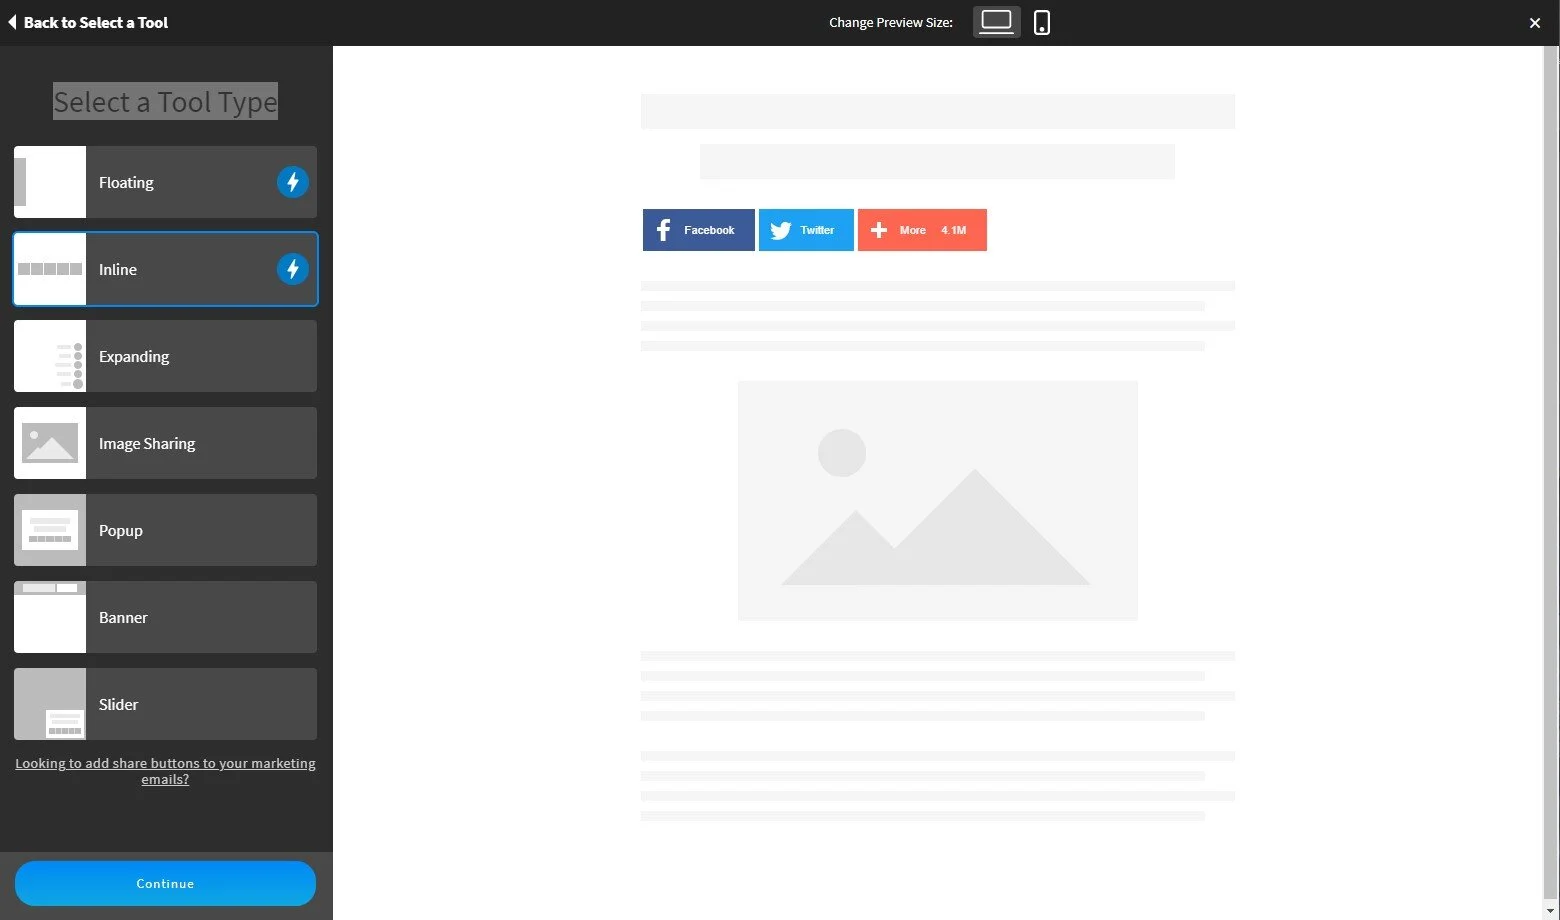
Next, you’ll be taken to the SELECT A TOOL TYPE page. I’m going to show you “Inline” social share buttons.
Select “Inline” (or whatever button category you want) and then click “Continue.”
2. Button Selection & Styling
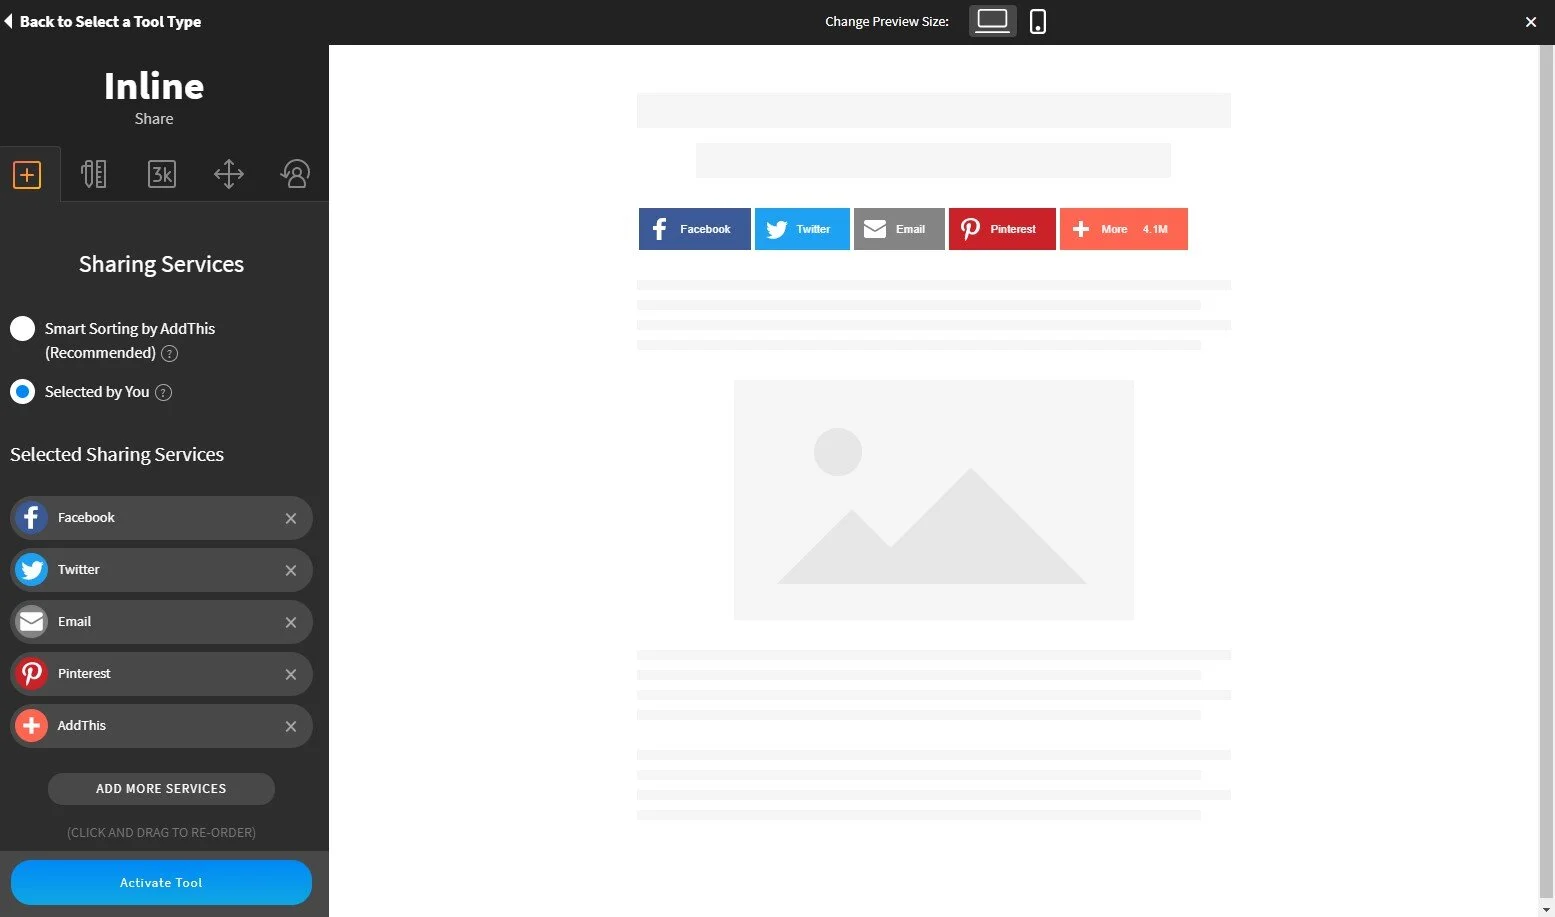
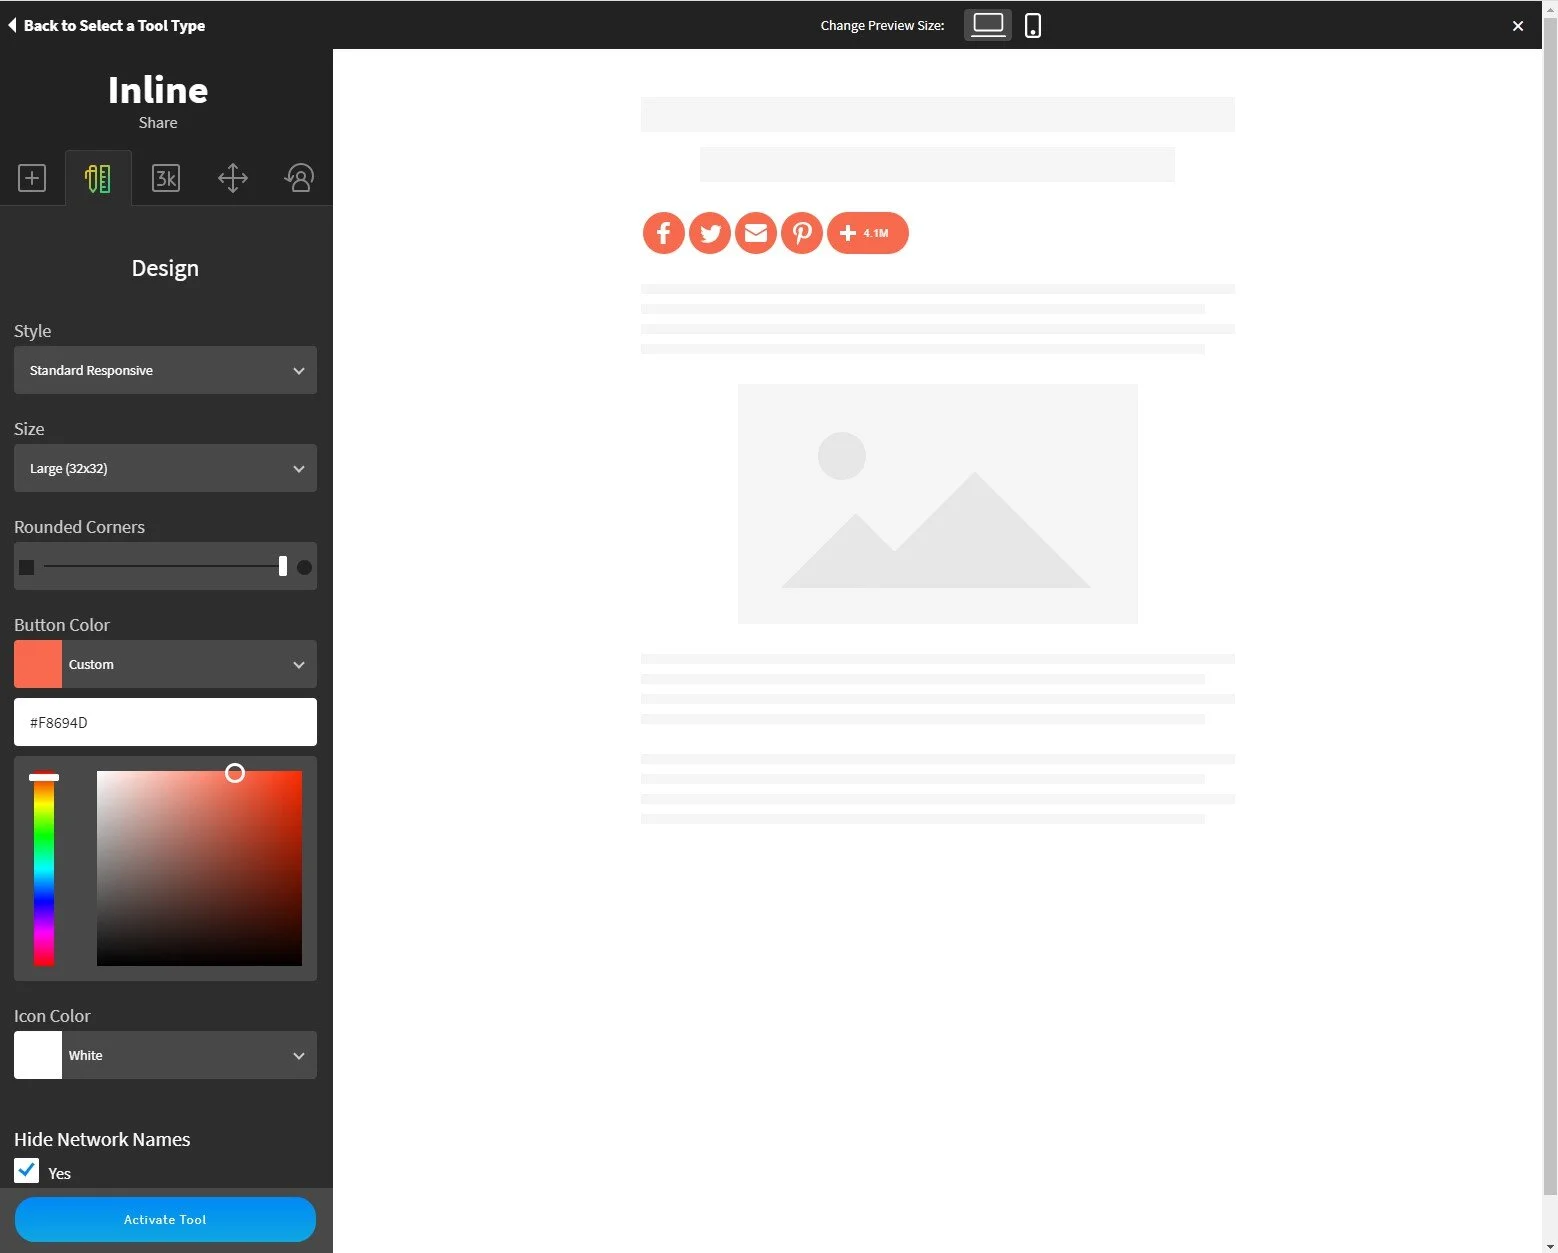
You’ll be taken to the “Inline” button design panel. Now comes the fun part. There are different tabs at the top.
The first tab has a + sign for Sharing Services. Click “Selected By You” to pick and choose which sharing services you want to display on your blog, or whatever pages on your site. AddThis has a huge selection of sharing services.
Choose the ones you want and click and drag to reorder them.
Protip: Include the “AddThis” (with the orange + sign) to let your audience share to any of the additional sharing services besides the ones you’ve chosen to display.
Click the next tab with the pencil and ruler icon. Style your buttons as you want.
Protip: If you want minimalist, circle-shaped buttons, click “Hide Network Names” and then drag the “Rounded Corners” meter all the way to the right.
Finish up your styling by clicking on the “Share Counters” tab if you want to display counts.
There are two other tabs titled “Position” and “Behaviors” that I didn’t use.
When you have all the sharing services you want to display and your styling options set, click the “Activate Tool” button at the bottom left.
3. Activate Tool
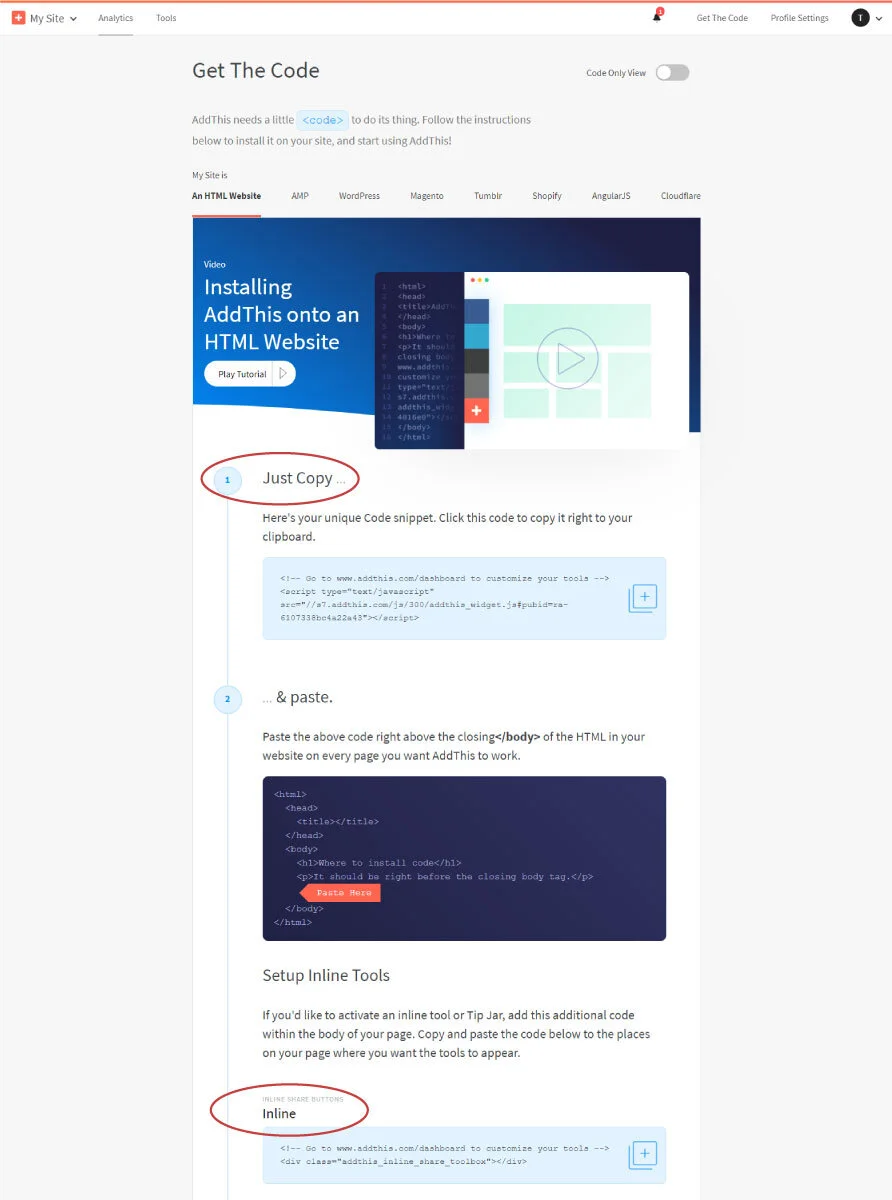
Clicking the “Activate Tool” button brings you to your AddThis dashboard. Click the “GET THE CODE” page on the upper right.
On “An HTML Website” tab (the default) copy your unique code snippet.
On your Squarespace site, go to SETTINGS → ADVANCED → CODE INJECTION. Then go to the box labeled FOOTER and paste the code in. Click SAVE. (Note that Code Injection is a Squarespace Premium feature.)
4. Inline Share Buttons Code
If you chose Inline buttons, you need to paste one more piece of code. Here’s where my directions offer a helpful tweak:
AddThis says to copy/paste the code wherever you want your share buttons to appear on a page. For Squarespace users, this would normally mean inserting a CODE block on your page and pasting in the code.
The Code block will work fine. However, even though I use a blog template for each post, I don’t want to have to rely on that. Also, if I already have several published posts, I’d have to manually add the code block to each.
Display social share buttons on ALL of your blog pages:
Copy your INLINE code.
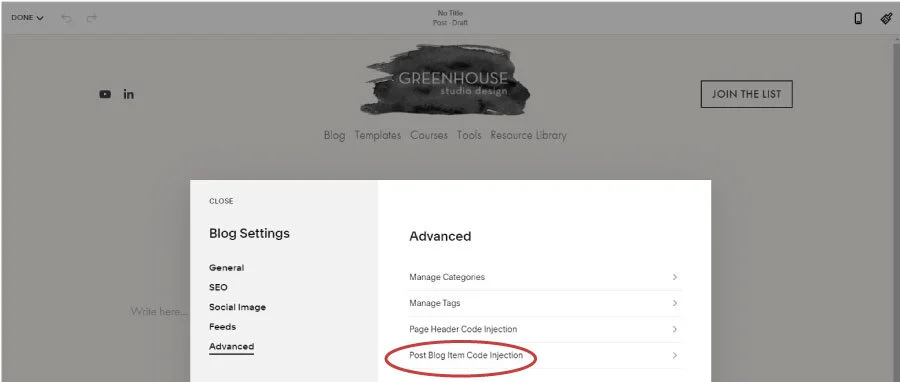
Go to your Squarespace Blog Collection page (where all of your blog posts are listed) and click the Gear icon to bring up your BLOG SETTINGS.
Click ADVANCED → POST BLOG ITEM CODE INJECTION. Paste the Inline code into the BLOG POST ITEM CODE INJECTION box and click SAVE.
Voila - all of your blog posts should now feature your Social Share buttons at the bottom of your posts. However, if you want them centered, read on.
Centering Your Inline Social Share Buttons
So as easy as AddThis was to use, I was surprised it didn’t have a justification option to center Inline share buttons. After doing some searching, I found some code I tweaked to center them.
Go back to your Blog collection page settings (the Gear Icon). Click ADVANCED → POST BLOG ITEM CODE INJECTION.
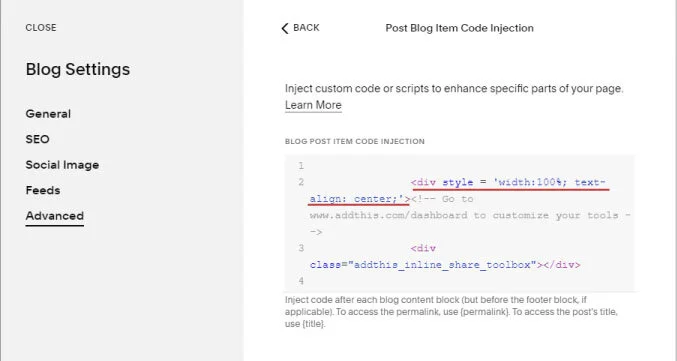
Directly in front of your original Inline code, PASTE <div style = 'width:100%; text-align: center;'>
It should look similar to mine below:
There you have it! You should now see your nicely styled and centered Social Share buttons on all of your blog post pages or on whatever pages you want to feature them. (Scroll down to the bottom of this post to see mine.)
One more AddThis note -
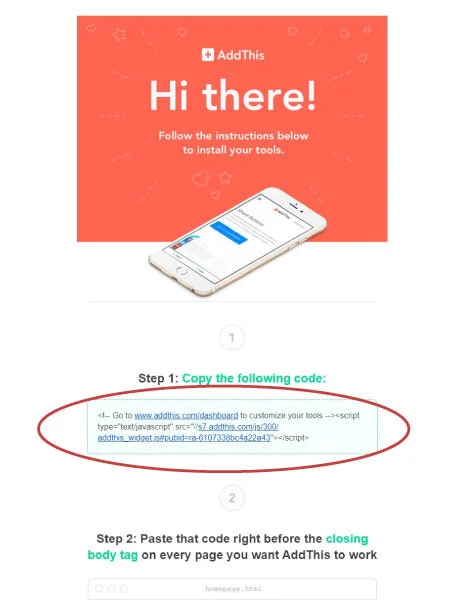
You’ll get a confirmation email after signing up. It has your basic site code that goes into your Footer Code Injection box. I found this to be confusing though and if you chose Inline buttons, that code isn’t included in the email.
So I recommend inserting the code as I described above rather than through the email.
Your confirmation email also has your code, but I recommend doing it all from your “Get The Code” page found on your AddThis dashboard.
Other interior design business-building posts:
Don’t forget to Pin it for later!
If you have any questions or comments, please drop me a note below. Be sure to check back for my response (I always respond) since no notification is sent.

